Summary: in this tutorial, you will learn how to install MySQL Server in the Ubuntu 20.04 LTS. We are providing here step by step guide with screenshots.
Prerequisites
Make sure that you are logged in with the sudo priviledges.
Installing MySQL on Ubuntu 20.04
At the time of writing this article, the latest version of MySQL server available in the Ubuntu repository is MySQL 8.0.27.
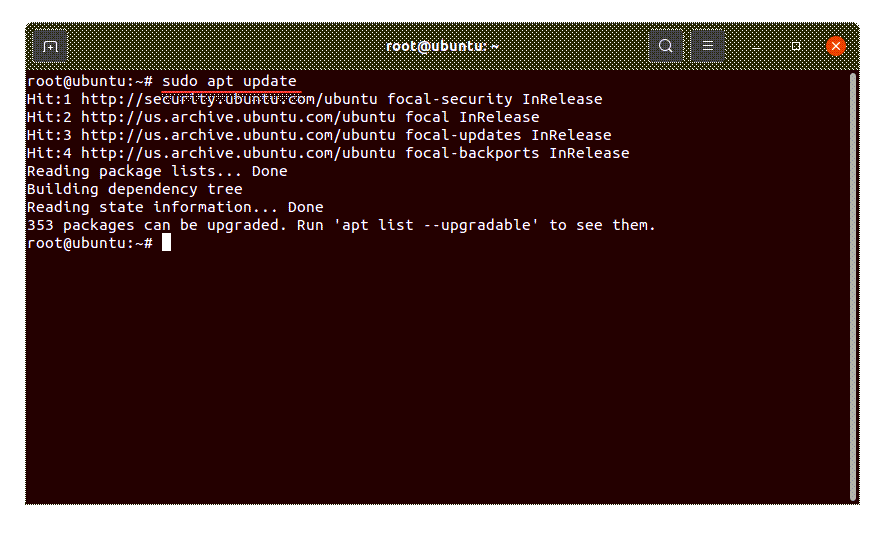
Step 1: Update the apt package
It is a standard practice to update the apt package manager before installing any package in Ubuntu. So, you can use the following command to update the repository package:
sudo apt update
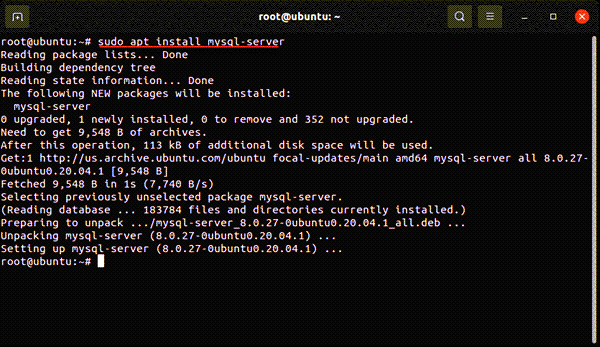
Step 2: Install MySQL Server on Ubuntu
Once the repository package is updated, you need to install package for “MySQL-Server”. For this you need to execute the following command.
sudo apt install mysql-server
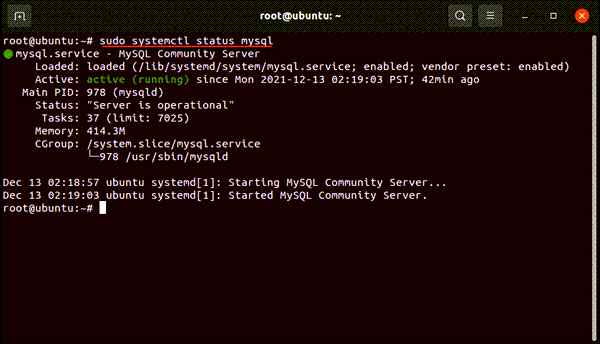
Step 3: Verify MySQL service status
The above step already install MySQL Server in Ubuntu. You can check the status of MySQL Server using the following command.
sudo systemctl status mysql
Incase, MySQL is not started, you can run it using the below command.
sudo systemctl start mysql
And after that you can run the following command so that MySQL can start the services once the system booted next time.
sudo systemctl enable mysql
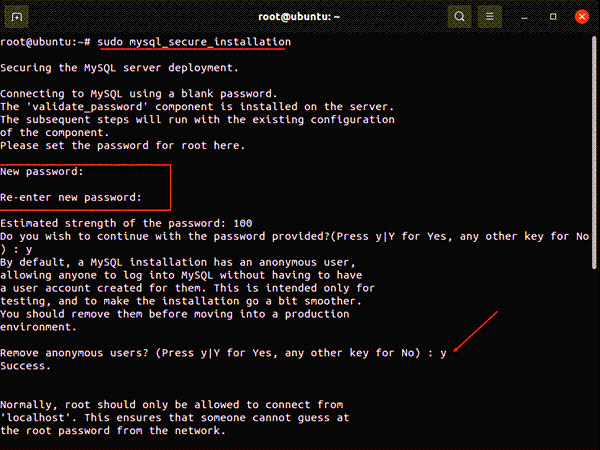
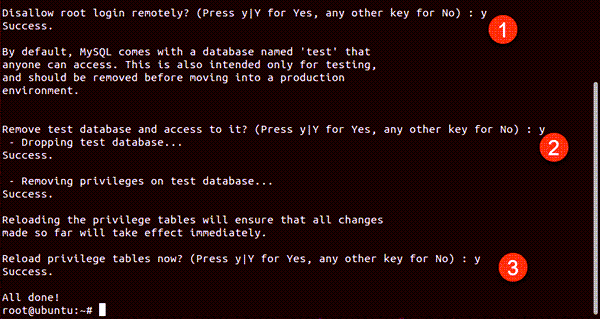
Step 4: Secure Configuration of MySQL
For fresh installations of MySQL, you’ll want to run the DBMS’s included security script. This script changes some of the less secure default options for things like remote root logins and sample users.
sudo mysql_secure_installation
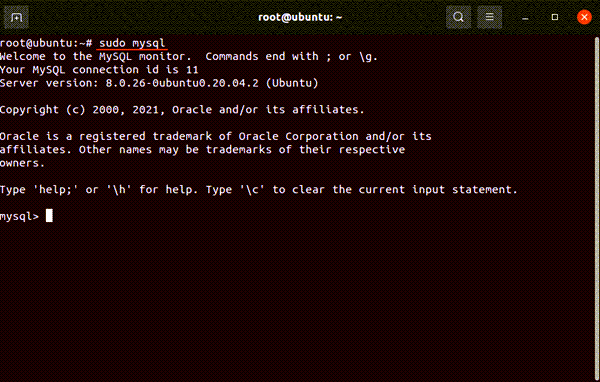
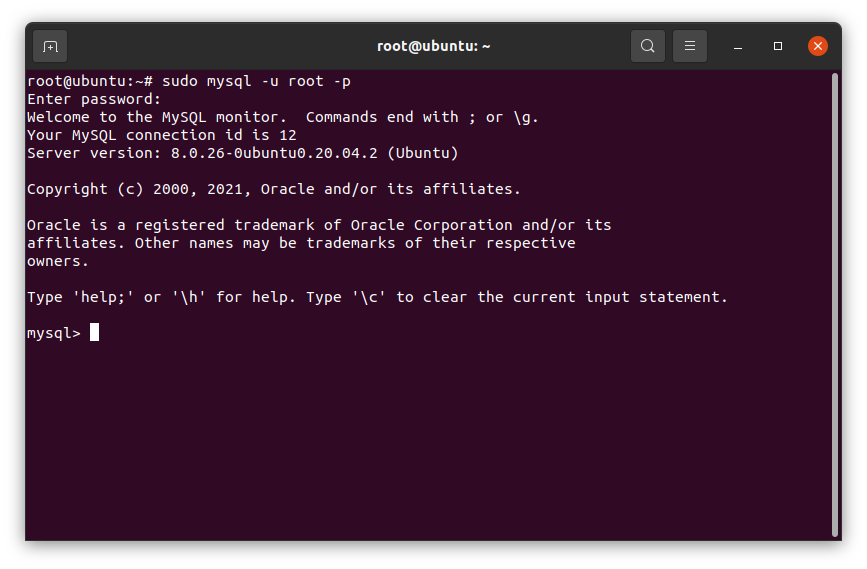
Step 5: Connect to MySQL server
Now you can connect to MySQL using either of the method.
Method 1:
sudo mysql
Method 2:
You can also connect to MySQL using the following command.
sudo mysql -u root -p
Here, you need to provide the root password of MySQL which you have created in the previous step. Once, the password is provided, the following prompt will come.
mysql>
Now, MySQL is successfully installed and configured in you Ubuntu system. You can check the already created databases using the follow command.
mysql> show databases;
Output:
+--------------------+
| Database           |
+--------------------+
| information_schema |
| mysql              |
| performance_schema |
| sys                |
+--------------------+
4 rows in set (0.04 sec)